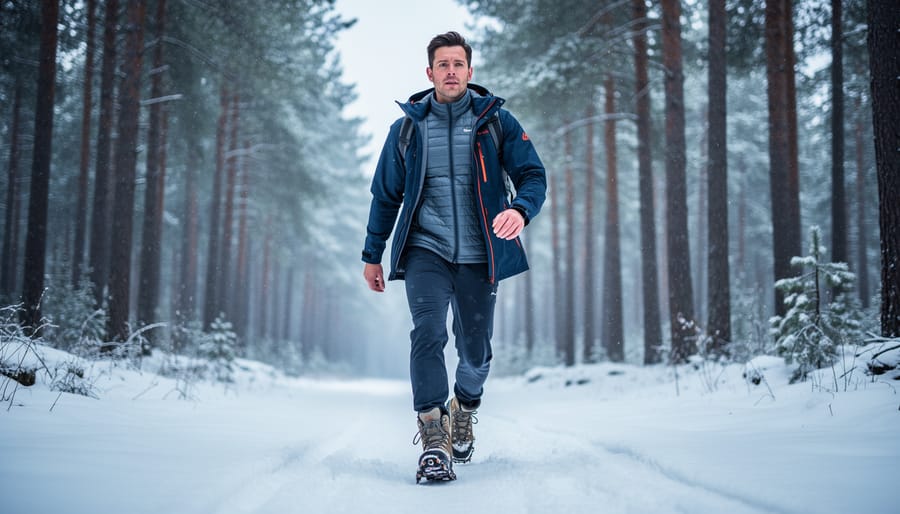
The right winter hiking gear comes down to three things: a layering system you can adjust on the trail, footwear that keeps your feet warm and dry, and traction aids for when the ground turns slick. Build the kit in that order and you’ll stay warm, dry, and comfortable even when the weather doesn’t cooperate. Plan on an hour or two of gathering and testing before your first outing, and a little patience if you’re starting from scratch.
Here’s why it works. Winter conditions swing wildly. One hike can hand you wind, bright sun, a flurry of snow, and an icy stretch of trail all before lunch. No single jacket or boot covers that, but a thoughtful set of pieces does. Your base layer sits against your skin, wicking moisture away while it holds in warmth. The mid layer adds insulation, and the outer layer shields you from wind and precipitation. Add footwear and traction aids suited to the surface, and you can handle cold temperatures and a bit of snow with confidence.
A cold-weather hike can be every bit as fun and rewarding as a summer trek. Often more so, with quiet trails and crisp air. Let’s build your kit, one layer at a time.
What Winter Hiking Gear Needs to Do (and When You Need It)
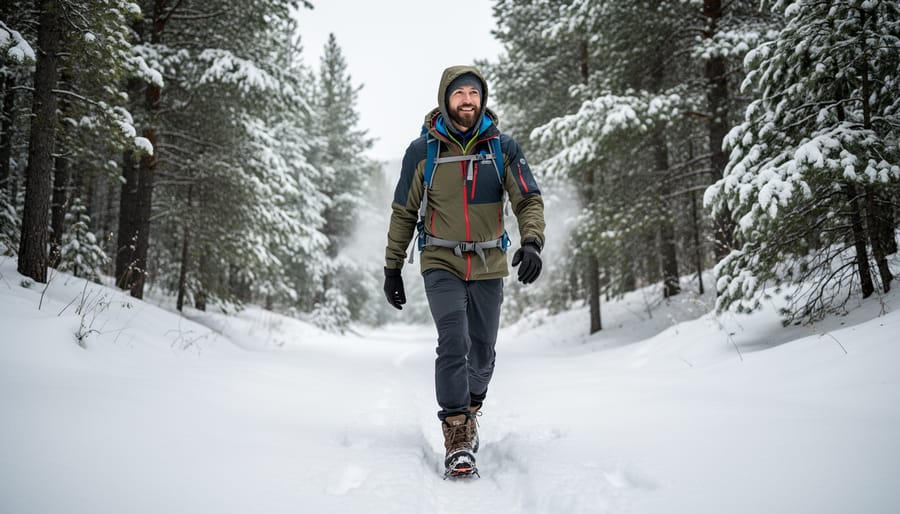
Think of your winter kit as having three jobs: keep you warm, keep you dry, and keep you comfortable, even when the day doesn’t go to plan. That last part matters more than most beginners expect. The goal isn’t gear that looks impressive in the garage. It’s gear that lets you actually enjoy being outside.
You’ll reach for this kit whenever you’re hiking in cold temperatures and a bit of snow. But here’s the catch: a winter day rarely stays one thing. Wind picks up, the sun breaks through, flurries turn to sleet, and the trail swaps from packed dirt to slush to ice. So a good day-hiking kit needs to flex across a fairly wide range of wind, sun, precipitation, and surface conditions rather than being built for one perfect forecast. Gear you can use for the whole season beats a one-day wonder every time.
I learned this the slow way. One crisp morning started bright and still, and I headed out lightly dressed, feeling clever. Two hours in, the clouds rolled over, the breeze turned sharp, and wet snow started falling. I was suddenly glad I’d tucked an extra layer in my pack. It’s the same kind of shift you’ll see planning a trip for winter in Bryce Canyon where a sunny start can change fast.
The lesson: build for change, not for one moment.
Tools and Materials: Your Winter Hiking Gear Checklist
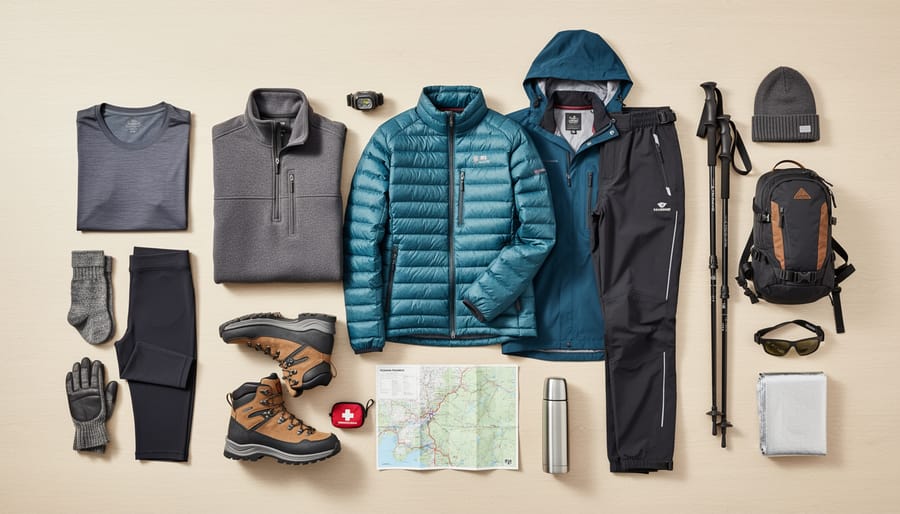
Clothing: The Three-Layer System
Think of your clothing as a team of three layers, each with its own job. Together they let you stay comfortable as the weather and your effort level change.
The base layer is the foundation. It sits closest to your skin, adds warmth, and wicks moisture away so you don’t stay damp. Base layers come as both tops and bottoms, so plan on covering your legs as well as your torso.
Next comes the mid layer, which builds on that warmth, and the outer layer, which stands between you and whatever the day throws at you. Don’t worry about memorizing the details yet. We’ll walk through each one in the steps ahead. For now, just picture the plan: base, mid, and outer, working together as one flexible system you can adjust on the trail.
Footwear and Traction Aids
Your footwear and traction gear do the hardest work on a winter hike, because the ground rarely stays the same for long. One stretch might be packed dirt, the next slick with ice or soft with fresh snow, and a good setup has to handle all of it without you stopping every ten minutes to fiddle with your feet.
That’s why the smartest approach is to choose footwear and traction aids that cover a fairly wide range of surface conditions, rather than gear built for one perfect day. Think of your boots as the steady foundation and your traction gear as the adjustable add-on you bring along for when the trail turns tricky.
Warm, dry feet also change how the whole day feels. When your toes are comfortable, you’re far more likely to keep walking, keep smiling, and actually enjoy the view. The steps ahead will show you how to choose and test both.
Waterproof and Weather-Protection Extras
Once your layers, footwear, and traction are sorted, a few weather-protection extras round out the kit. You don’t need all of them on every outing. Add them as conditions call for them.
Waterproof items come first. If precipitation is in the forecast, a waterproof shell over your mid layer keeps the damp out, and waterproof gloves or mitts protect the hands that tend to chill first. A simple waterproof pack cover or a dry bag keeps spare layers from getting soaked, which matters more than you’d think when you’re counting on that dry sweater at the summit.
Then think about wind and sun. Winter light can be surprisingly bright, especially on snow, so sunglasses and sunscreen earn their spot in the pack. A warm hat and a neck gaiter are easy to add or remove as you heat up or cool down.
Check the conditions before you go, then pack for what’s likely, not just what’s hoped for.
Safety First: Cold-Weather Warnings and When to Turn Around
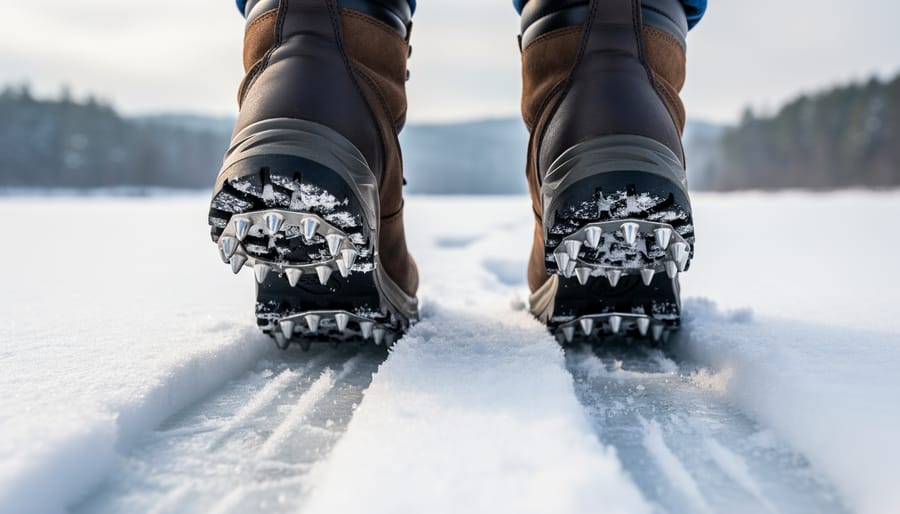
The good news about winter hiking is that the right gear makes the whole outing enjoyable, even when conditions turn. The goal isn’t to avoid every bit of discomfort. It’s to notice problems early and adjust before they snowball.
Watch for three warning signs that your kit isn’t doing its job. First, dampness: if your base layer feels clammy from sweat or your outer layer is letting moisture creep in, your warmth is already at risk. Second, feeling chilled when you stop moving, or a chill that doesn’t fade once you’re back on the trail. Third, slippery footing, whether that’s packed snow, ice, or a slick stretch of trail where your boots suddenly feel less sure.
Here’s the part beginners often miss: adding a layer, swapping to traction aids, or heading back to the trailhead isn’t failure. It’s skill. Experienced hikers do it constantly, usually long before things feel urgent. Pulling on a mid layer at the first hint of a chill, or shedding one before you start sweating, keeps you in the comfortable zone and saves your energy for the fun parts.
A little extra support can help with that confidence on uneven ground, too. Some hikers like carrying a survival hiking stick for balance on questionable footing.
Treat each outing as a conversation with the conditions. If the gear is working, keep going and enjoy it. If it isn’t, you’ve simply learned something worth knowing for next time.
Step-by-Step: Build Your Winter Hiking Kit
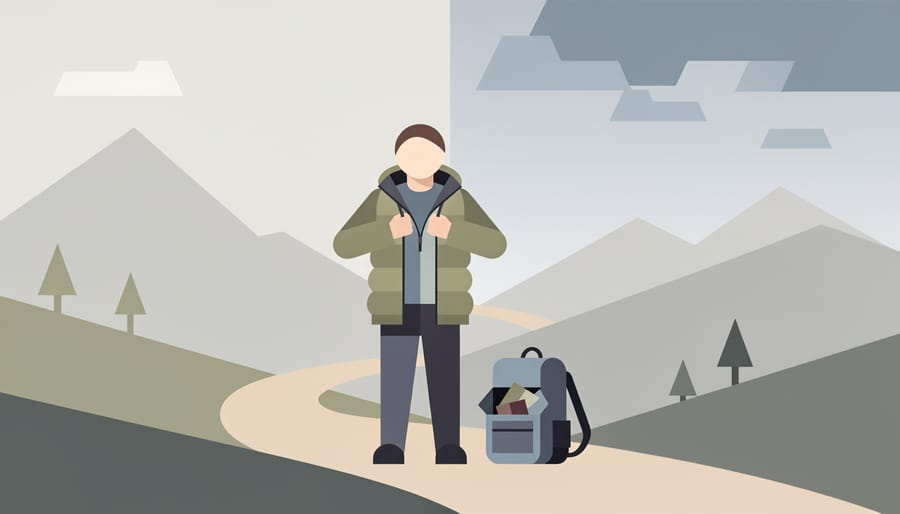
Step 1: Start With a Base Layer That Wicks Moisture
Your base layer is the first thing that touches your skin, so it has the biggest say in whether you feel cozy or clammy an hour into the trail. It does two jobs at once: it holds in warmth, and it wicks moisture away from your body so sweat doesn’t sit there and chill you.
Base layers come as both tops and bottoms, so plan on a pair, not just a shirt. It’s easy to focus on the upper body and forget your legs, but they’re working hard on every climb too.
I learned this the uncomfortable way on one of my first cold-weather outings. I wore a regular cotton t-shirt underneath my jacket, figuring the jacket would do the heavy lifting. Within a couple of climbs I was sweating, and the damp shirt clung to my back. The moment we stopped for a snack, I went from warm to shivering fast. On my next hike I swapped in a proper moisture-wicking base layer, and the difference was striking. I stayed dry against my skin, and stopping for a break felt like a pause instead of a problem.
When you shop, look for fabrics made to wick moisture, and try the top and bottom on before you commit.
Step 2: Add Mid and Outer Layers You Can Adjust
Once your base layer is sorted, the next two pieces do the heavy lifting. The mid layer is your insulation. It traps the warmth your body makes, so it’s the piece you’ll reach for when you stop for a snack or the wind picks up. The outer layer is your shield, built to block wind and keep precipitation from soaking everything underneath.
The real trick isn’t owning these layers, it’s being able to adjust them. Effort changes everything on a winter trail. You’ll feel toasty grinding uphill, then chilled the moment you pause at a viewpoint. I learned this the hard way on an early cold-weather outing, when I stayed bundled up on a climb and ended up damp and shivering at the top. Now I shed the mid layer before I start to sweat, and pull it back on the second I stop moving.
Conditions shift too. Sun, wind, and different kinds of precipitation can all show up in a single outing, which is why a layering plan beats one big heavy coat. Choose pieces that are easy to put on and take off while you’re wearing a pack. Stowing a layer for ten minutes is far easier than fixing a problem after you’re already cold or wet.
Step 3: Choose Footwear That Handles Changing Surfaces
Your boots do more work than anything else you carry, so give them the most attention. Winter trails rarely stay one thing: you might cross packed dirt, slushy melt, crusty snow, and a glazed patch of ice all in one afternoon. Look for footwear that stays comfortable and keeps your feet dry across that whole range, not just on a perfect day.
When you try on a pair, wear the socks you’ll actually hike in and shop late in the day, when feet are a touch swollen. Your heel should stay put when you walk, and your toes should have room to wiggle without sliding forward on a downhill. Tight boots restrict circulation, and cold toes usually follow. Check that the sole has a deep, grippy tread, since a slick sole turns every icy patch into a gamble.
Then test it. Walk around the house on stairs, or on an incline if you have one, and notice any rubbing or pressure points. A hot spot at home becomes a blister on the trail. I learned this one the hard way, swapping to a thicker sock halfway up a climb and finding my boots suddenly too snug.
If you also paddle, much of the same logic about fit and dry feet carries over, and our guide to kayaking gear basics covers it from the water side.
Step 4: Pack Waterproof Gear and Traction Aids for the Conditions
Before you shoulder your pack, look at the forecast and the trail reports and ask three questions: Will I be walking through snow? Could there be ice? What kind of precipitation is likely? Your answers decide what earns a spot in your pack.
Start with waterproof gear. A waterproof outer layer, meaning a shell jacket (and pants, if you expect wet snow or rain), is your shield when precipitation shows up. If the day looks dry and clear, you might wear only the jacket and leave the pants in your pack. If you’re expecting wet conditions, wear both. Cold is manageable, but cold and wet is what makes a hike miserable, so keep a dry spare layer sealed in your pack.
Next, traction aids. These are devices that strap onto your boots to help you grip slick surfaces, and they matter because winter surfaces can change fast, from packed snow to bare dirt to glazed ice. If the trail might be icy, carry them, even if the start looks clear. A shaded stretch halfway through can surprise you.
Think of it this way: carrying a little extra weight beats being stuck without the right tool. When in doubt, pack it.
How to Verify Your Gear Before the Trailhead and What to Do Next
Before you commit to a longer winter hike, give your kit a low-stakes test run. It takes an evening and can save you from a miserable day on the trail.
Start at home with a full try-on. Put on your base, mid, and outer layers together and move around: reach overhead, squat, swing your arms. Everything should fit comfortably over the layer beneath it without bunching or restricting you. Then run through this quick checklist:
- Your layers fit comfortably over each other and let you move freely.
- Your footwear fits well with the winter socks you plan to wear.
- Your traction aids attach securely and stay put.
- Your waterproof items sit within easy reach, not buried at the bottom of the pack.
- The whole kit suits the day’s expected conditions, from wind and sun to precipitation and surface.
Next, take a short test walk close to home, around the block, a local park, or even your backyard. Pack your bag exactly as you would for the trail, and if you’re still deciding how to choose a hiking bag this is a great time to notice whether it carries your layers comfortably.
One of our contributors learned this the easy way. A twenty-minute loop around the neighborhood showed that her new boots rubbed at the heel once her thicker socks were on. Out on a real trail, that would have meant a long, painful miles. Instead, she swapped socks and adjusted the lacing before ever leaving town.
Do a final conditions-and-pack check on the morning of your hike. Glance at the forecast, confirm your waterproof gear and traction aids are packed, and make sure you can add or shed a layer easily.
If something feels off, adjust it now. Once the test walk feels easy, stretch your outings a little longer each time. Confidence builds one comfortable mile at a time.
Winter Hiking Gear FAQs
Here are quick answers to the questions beginners ask most often. If you’re still deciding what to bring, start with a flexible kit instead of chasing a perfect one.
What do I need for winter hiking?
You need footwear, clothing, and traction aids that can handle a fairly wide range of temperatures, wind, sun, precipitation types, and surface conditions. The core of the clothing plan is a base, mid, and outer layer.
Why do base layers matter so much?
Base layers sit closest to your skin, so they do two jobs at once: they provide warmth and wick moisture away. They come as both tops and bottoms, which means you can cover your whole body with the same system.
Can I use the same gear across different cold-weather conditions?
Yes, and that’s the whole idea behind a good kit. Because your layers can be added or removed, one setup flexes across wind, sun, and different kinds of precipitation rather than being built for a single perfect day.
How do I stay comfortable as conditions change?
Adjust your layers early instead of waiting until you feel miserable. Keeping your gear flexible, and noticing when you’re getting damp or chilled, lets you make small changes before they turn into big problems.
A cold-weather hike can be every bit as fun and rewarding as one in the warmer months, as long as you have the proper gear to stay warm, dry, and comfortable even when conditions turn. You don’t need everything on day one. Start with the layering system, add footwear and traction as the trail calls for them, and build from there. If your outings stretch toward dusk, a small light source helps too, and a solar lantern for trips is one easy way to carry some without worrying about batteries.
Every hiker’s kit ends up a little different. Treat these answers as a starting point, test your setup on a short outing, and let your own experience shape what you carry next.
Here’s the good news: a cold-weather hike can be every bit as fun and rewarding as a trek in the warmer months. The right gear is what makes that true. A base layer that wicks moisture, mid and outer layers you can adjust, footwear that handles changing surfaces, and the waterproof and traction extras to match the conditions will keep you warm, dry, and comfortable even when the weather turns.
You don’t need a perfect kit on day one. Start small. Pick a short, familiar trail, wear your layers around the neighborhood first, and notice what feels right and what doesn’t. Adjust, then go a little farther next time. Every outing teaches you something about how you move and what you need.
When you’re out there, take a moment to enjoy the quiet that winter brings. Then tell us about it. What gear surprised you, and what did you learn on your first cold-weather hike? We’d love to hear your winter hiking stories.