
Visit this site to understand professional standards, then apply that same rigor to your remote maintenance routine. Inspect your chimney monthly during burning season by climbing onto your roof with a flashlight to check for visible creosote buildup, cracks in the chimney cap, and loose flashing where water might penetrate. Clean your stovepipe and chimney every 50-70 burns or when creosote accumulates to one-quarter inch thickness, using a properly sized wire brush and working from the roof down to capture falling debris in your firebox. Test your chimney draft before each winter by holding a lit match near the stove’s air intake—weak or reverse airflow signals dangerous blockages that demand immediate clearing.
Off-grid living means your wood stove isn’t just comfort—it’s survival infrastructure that keeps your family warm through months of isolation. Unlike grid-connected homeowners who can call emergency services when things go wrong, you’re managing a heating system where neglect can mean a chimney fire miles from the nearest fire department. I learned this during my second winter off-grid when a creosote ignition sent flames shooting four feet above my chimney cap at 2 AM, teaching me that maintenance isn’t optional—it’s essential off-grid knowledge as fundamental as water storage or food preservation.
This guide walks you through establishing a maintenance rhythm that prevents emergencies rather than reacting to them. You’ll discover which tools justify space in your limited storage, how to recognize warning signs before they become crises, and which shortcuts seasoned off-gridders use to maximize safety while minimizing effort. Your chimney is a working partner in your self-sufficient lifestyle—treat it with the attention it deserves.
Why Off-Grid Chimney Maintenance Is Different
When you’re living remotely with wood heat as your lifeline, chimney maintenance isn’t just another homeowner task—it’s a critical survival skill. Unlike conventional homes where a heating system failure means calling a repair service, those embracing off-grid living face stakes that are considerably higher.
The most obvious challenge is isolation. Professional chimney sweeps rarely service areas beyond established service routes, and even if they do, scheduling might mean waiting weeks or paying premium travel fees. This reality means you become your own expert, responsible for recognizing problems before they escalate. I learned this firsthand during my second winter in a remote cabin when I noticed decreased draft—waiting for professional help simply wasn’t an option, so mastering the inspection myself became non-negotiable.
Wood quality presents another unique variable. While suburban homeowners might purchase consistent, seasoned cordwood from reliable suppliers, off-grid dwellers often harvest their own timber. You’re burning what’s available on your property—sometimes perfectly seasoned oak, other times hastily dried pine because an unexpected cold snap arrived early. This variability directly impacts creosote buildup rates, meaning your maintenance schedule needs flexibility that standard guidelines don’t always account for.
The consequences of chimney failure multiply exponentially in remote locations. A chimney fire twenty miles from the nearest fire department, down a seasonal road that might be impassable, transforms from an inconvenience into a potential catastrophe. Your home isn’t just your shelter—it’s often integrated with autonomous home systems that you’ve carefully built and depend upon year-round.
Perhaps most significantly, wood heat isn’t supplemental when you’re off-grid—it’s primary. You can’t simply switch to another heat source while addressing chimney issues. This dependence means maintenance must happen proactively, during shoulder seasons, never waiting until problems force your hand. Understanding these differences transforms chimney care from routine maintenance into an essential pillar of your self-sufficient lifestyle.
Understanding What’s Happening Inside Your Chimney
The Three Stages of Creosote Buildup
Understanding what you’re looking at when you inspect your chimney can make the difference between a routine cleaning and an emergency. During my first winter off-grid, I discovered what I thought was just a light dusting in my chimney was actually the beginning of a more serious problem. Learning to identify creosote stages became as essential as knowing how to split kindling.
Creosote builds up in three distinct stages, each progressively more dangerous and harder to remove:
- Stage One: Flaky Soot
- This appears as a loose, flaky deposit with a texture similar to charcoal dust or cornflakes. It brushes away easily with a chimney brush and indicates you’re burning relatively hot, efficient fires.
- Stage Two: Crunchy or Tar-like
- This layer has a shiny, hardened appearance with a texture ranging from crunchy flakes to sticky tar. It requires more aggressive brushing and scraping to remove and signals that combustion temperatures are dropping too low.
- Stage Three: Glazed Creosote
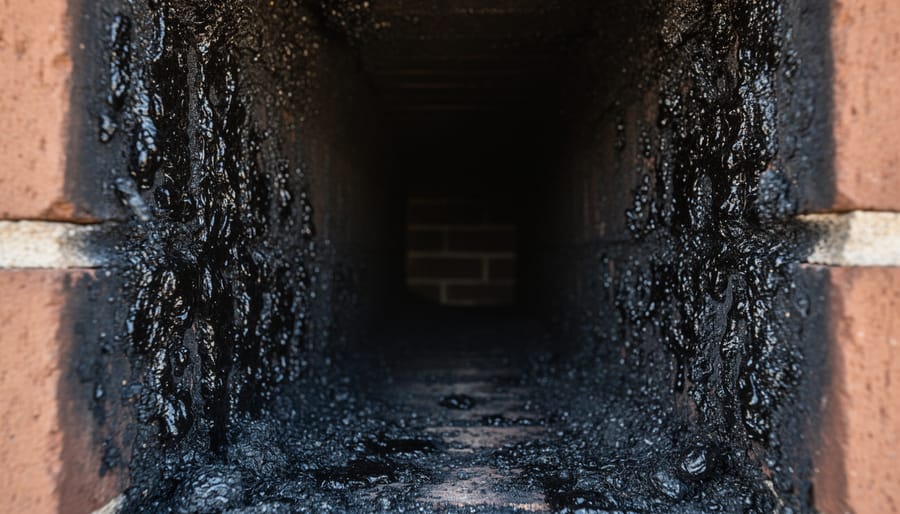
- This is the danger zone—a hard, shiny, glass-like coating that’s extremely difficult to remove with standard tools. This glaze is highly flammable and often requires professional removal or specialized chemicals.
When you run your hand along your chimney brush after inspection, stage one will leave black dust on your fingers. Stage two feels tacky or produces small, hard chunks. Stage three resists your brush entirely, reflecting light like dark glass when you shine your flashlight up the flue. If you spot stage three buildup, stop using your stove immediately. This isn’t the time for DIY heroics—that glaze can ignite at temperatures your stove regularly reaches, turning your chimney into a blowtorch that can crack flue liners or ignite your roof.
Signs Your Chimney Needs Immediate Attention
Your chimney will tell you when something’s wrong—you just need to know its language. I learned this the hard way during my second winter off-grid, ignoring subtle hints until smoke started backing into my cabin during a dinner party. Not my finest moment.
The most obvious sign is smoke entering your living space instead of drawing up the chimney. This reduced draft often means significant creosote buildup is restricting airflow. You might also notice your fire struggling to stay lit or requiring constant attention to maintain.
Take a flashlight and peer up into your chimney from below. If you see a thick, tar-like coating or hanging deposits that look like black icicles, you’re overdue for cleaning. Even a quarter-inch of buildup warrants action—creosote is highly flammable and the primary cause of chimney fires.
Strange odors are another red flag. A strong, acrid smell during humid weather or summer months indicates creosote deposits releasing their scent. Some describe it as a campfire smell when there’s no fire burning.
Visible cracks in your chimney’s masonry, rust on the damper or door, or a damaged chimney cap all demand immediate attention. In remote locations where help isn’t minutes away, catching these warning signs early isn’t just about efficiency—it’s about safety and self-reliance.
Essential Tools for DIY Chimney Maintenance
When I first started maintaining my cabin’s chimney five years ago, I stood in the hardware store overwhelmed by dozens of specialty tools I wasn’t sure I needed. Living thirty miles from the nearest town, every purchase had to count. Through trial and error, I’ve learned what truly matters for safe, effective chimney maintenance on a budget.
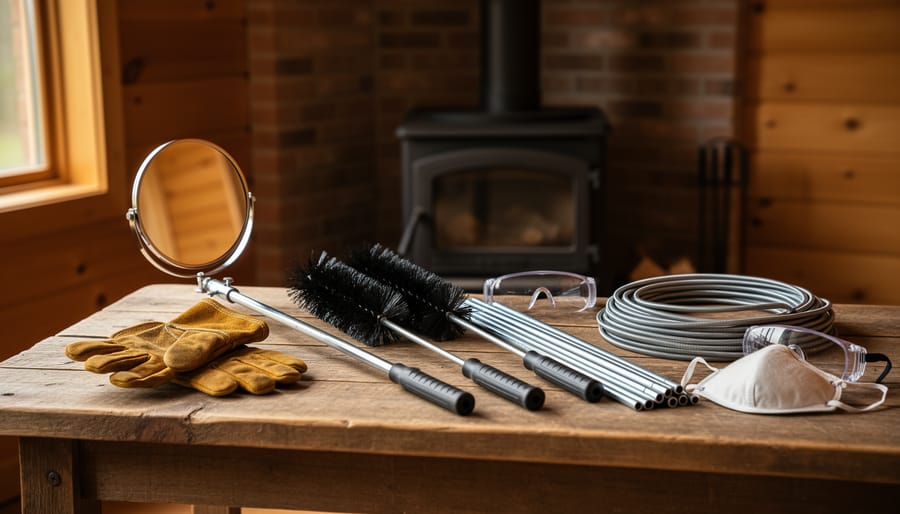
Your absolute foundation starts with a proper chimney brush sized to match your flue diameter. Measure carefully because a brush too small misses dangerous creosote buildup, while one too large can damage clay liners. Wire brushes work for metal flues, while poly brushes suit masonry chimneys. I learned this lesson after scratching my clay liner with an overly aggressive wire brush during my first cleaning attempt.
Flexible rods connect your brush to reach the full chimney height. Fiberglass rods are lightweight and easier to maneuver for beginners, though my veteran neighbor swears by heavier steel rods for their scrubbing power. Start with fiberglass if you’re working alone.
| Tool | Priority Level | Typical Cost | Expected Lifespan |
|---|---|---|---|
| Chimney brush (correct size) | Essential | $25-40 | 3-5 years |
| Flexible rods (fiberglass) | Essential | $40-60 | 10+ years |
| Drop cloth and bucket | Essential | $15-20 | Indefinite |
| Inspection flashlight | Highly recommended | $20-35 | 5+ years |
| Telescoping inspection mirror | Optional | $15-30 | 10+ years |
The items following your brush and rods make the job safer and more thorough. Heavy canvas drop cloths protect your living space from soot better than plastic tarps, which tear easily. A dedicated metal bucket catches debris and reduces fire risk if hot embers remain.
For inspection work, invest in a quality LED headlamp rather than expensive inspection cameras. At fifteen dollars, my headlamp reveals cracks and creosote buildup just as effectively. A small telescoping mirror helps check hard-to-see areas, though you can start with a regular hand mirror attached to a stick.
Skip the chemical cleaners marketed for chimneys. Manual brushing remains more reliable, especially when professional help is hours away and you need confidence in your work.
Your Seasonal Chimney Maintenance Routine
Pre-Season Inspection and Cleaning
Before the first cold snap arrives and you’re dependent on your wood stove for warmth, autumn is your window of opportunity for a thorough chimney inspection. I learned this lesson the hard way during my second winter off-grid, when a sluggish draft on a freezing November morning revealed I’d skipped my fall maintenance routine. Trust me, you don’t want to troubleshoot chimney problems when your fingers are already numb.
Start your pre-season preparation with a systematic approach that covers every critical element:
- Begin from the rooftop, examining the chimney cap and spark arrestor for rust, damage, or debris accumulation that could restrict airflow.
- Inspect the chimney exterior for cracks, loose mortar, or gaps where moisture could penetrate and cause freeze-thaw damage during winter.
- Remove the stovepipe sections inside your cabin, checking each joint and seam for creosote buildup or deterioration.
- Use a chimney brush matched to your flue size, scrubbing from top to bottom with steady, overlapping strokes to dislodge all creosote deposits.
- Clean out the ash trap or cleanout door at the chimney base, removing all debris before sealing it back up.
- Test your draft by lighting a small test fire, observing smoke movement and listening for any unusual sounds that might indicate blockages.
During one memorable inspection, I discovered a perfectly constructed bird’s nest wedged just above my damper, complete with bits of dried grass and what looked suspiciously like strands from my old sleeping bag. That industrious bird had completely blocked my flue. Now I always install my chimney cap immediately after spring’s final fire, though I appreciate the reminder that nature will reclaim any space we leave unguarded. Always expect surprises and give yourself plenty of daylight to address whatever you discover.
Mid-Season Check-Ups
During peak burning season, a quick monthly inspection can save you from unpleasant surprises. I learned this the hard way during my second winter off-grid when I ignored a subtle change in my stove’s draft—only to discover dangerous creosote buildup that could have sparked a chimney fire.
Start your check-up by observing your fire’s behavior. Has it become harder to start? Does smoke occasionally backdraft into your cabin? These are early warning signs worth investigating. Next, head outside on a clear day when you’re running a hot fire. Look at your chimney smoke—it should be nearly invisible or light gray. Thick, dark smoke suggests incomplete combustion and rapid creosote formation.
Check the exterior chimney for any new cracks, loose flashing, or gaps where weather has penetrated. Run your hand along accessible pipe sections (when cold) feeling for any temperature variations that might indicate internal damage. Inside, open your cleanout door if accessible and peek in with a flashlight. You’re looking for excessive buildup—anything more than an eighth-inch thick warrants action.
Keep a simple log noting what you observe. Patterns emerge over time, helping you predict when professional cleaning becomes necessary. Remember, catching issues early means addressing them on your schedule, not during a winter emergency.
End-of-Season Deep Clean
After a long winter of keeping you warm, your chimney deserves some serious attention. I remember the first spring I postponed this deep clean—big mistake. When I finally climbed up there in June, the creosote had hardened into something resembling volcanic rock, making what should have been a two-hour job stretch into a full weekend ordeal.
Start your end-of-season clean on a dry, mild day when you can open everything up. Begin by giving your chimney the most thorough brushing it’s had all season. Work from top to bottom, using your chimney brush in slow, deliberate strokes. Make multiple passes, rotating the brush as you go. You’re not just doing maintenance now—you’re removing every bit of winter buildup before it has months to bake in summer heat.
Once you’ve swept thoroughly, inspect every accessible inch. Run your hands along the interior stovepipe joints, feeling for loose connections or thin spots. Check the chimney cap for rust or damage from ice and snow. A friend of mine discovered a crack in his cap during spring inspection that would have let rain pour straight down all summer, potentially causing serious rust damage.
For summer storage, some off-gridders leave a small amount of ash in the firebox to absorb moisture, while others prefer emptying it completely and leaving the door slightly ajar for airflow. Whatever you choose, ensure all dampers are closed to prevent birds from nesting inside—trust me, discovering a family of starlings in September is nobody’s idea of fun.
How to Clean Your Chimney Safely (Even If You’ve Never Done It)
Top-Down vs. Bottom-Up Cleaning
When you’re miles from the nearest chimney sweep, choosing the right cleaning method can save you hours of frustration. I learned this the hard way during my first season at a remote cabin, when I attempted a bottom-up clean on a three-story chimney and ended up covered in more soot than what actually made it into my bucket.
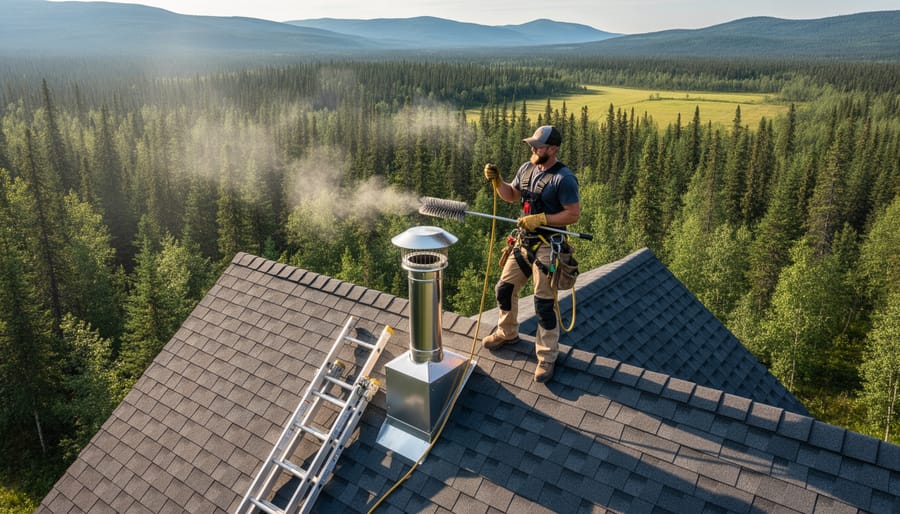
Top-down cleaning involves working from the roof downward, using extension rods to push debris into the firebox below. This method has become my go-to approach for most situations. You’ll need safe roof access and steady footing, which can be challenging in winter months. Bottom-up cleaning, where you work from inside the house pushing upward, offers the advantage of staying safely on solid ground.
- Gravity works with you, making debris removal more efficient
- You can visually inspect the chimney cap and flashing while you’re up there
- Less mess inside your living space since soot falls directly into the firebox
- Better control over stubborn creosote deposits
- Requires safe roof access, which can be dangerous in wet or icy conditions
- Not feasible if you’re uncomfortable with heights or have mobility limitations
- Need longer extension rods for taller chimneys, adding to equipment costs
For off-gridders, I recommend mastering both techniques. Weather and physical capability might dictate your choice on any given cleaning day, and having the flexibility to adapt keeps your maintenance schedule on track regardless of conditions.
What to Do With All That Creosote
You’ve scraped out that black, crusty creosote, and now you’re staring at a bucket of what looks like toxic sludge. Here’s the truth: never, ever burn it again or toss it in your compost. Creosote contains harmful chemicals that intensify when reheated and contaminate soil.
The safest disposal method? Let it dry completely in a metal container outdoors, away from structures. Once dried, double-bag it in heavy-duty plastic bags and dispose of it with regular household waste, following your local regulations. Some municipalities classify creosote as hazardous waste, so check ahead if you’re hauling it to a transfer station.
A homesteader friend once spread creosote ash around his property as a pest deterrent. Big mistake. It killed beneficial insects and leached into his garden soil. Learn from others’ errors: treat creosote removal as seriously as the fire prevention it enables. This isn’t just waste management; it’s protecting your off-grid sanctuary and the land you’ve worked hard to steward responsibly.
Preventing Problems Before They Start
Burning Hotter, Cleaner Fires
I learned this lesson the hard way during my second winter in the cabin, when I’d let my stove smolder overnight to “save wood.” Within weeks, my chimney looked like it had been painted with tar, and I was facing a dangerous creep of creosote buildup. A friend who’d been living off-grid for decades set me straight: hot fires are clean fires.
The secret lies in understanding your air intake. When you first light your fire, open the air intake fully to get those flames roaring. You want to see active, dancing flames rather than lazy smoke curling around the logs. Once established, you can dial it back slightly, but never choke your fire completely. A proper burn should maintain temperatures between 500-700°F in the stovepipe—hot enough to vaporize creosote before it can condense on your chimney walls.
Here’s your step-by-step approach: Start with dry kindling and small splits, building up to larger pieces only after you’ve established a solid coal bed. Keep the air intake at least halfway open during active burning. If you see thick, dark smoke from your chimney, you’re running too cool and creating creosote.
Resist the temptation to bank fires overnight by closing all the vents. Instead, load your stove with dense hardwoods about an hour before bed, let them catch fully with good air flow, then reduce the intake to about one-third open. You’ll burn through more wood initially, but you’ll save yourself from dangerous buildup and the backbreaking work of excessive chimney cleaning. Your chimney will thank you with years of safer, more efficient service.
Why Your Firewood Matters More Than You Think
Here’s something most first-time off-gridders learn the hard way: your firewood choices directly impact how often you’re climbing up on that roof with a chimney brush. I discovered this after my first winter burning green pine, when creosote buildup forced me into monthly cleanings instead of the seasonal routine I’d planned for.
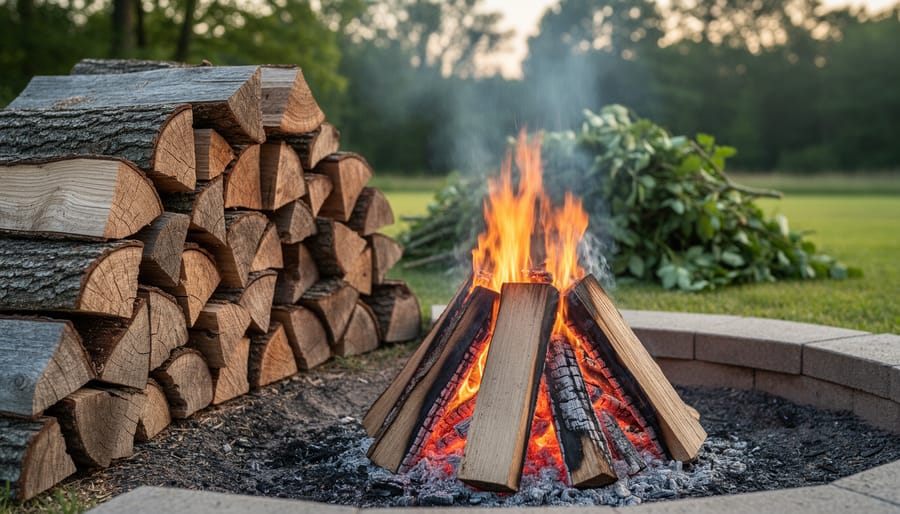
Hardwoods like oak, maple, and ash burn hotter and cleaner than softwoods, producing significantly less creosote. If you’re harvesting your own timber, prioritize these species when available. However, softwoods aren’t your enemy—they’re excellent for kindling and shoulder-season fires. One experienced homesteader told me she uses a 70-30 mix of hardwood to softwood throughout winter, which balances burn efficiency with resource availability.
Seasoning is non-negotiable. Wood needs 12-18 months of proper drying to reach the ideal 15-20% moisture content. Stack your wood in a sunny, well-ventilated area with the cut ends exposed to prevailing winds. Elevate it off the ground using pallets or poles to prevent moisture absorption, and cover only the top third—wrapping sides traps humidity.
For off-gridders, create a rotation system. Mark your stacks by cutting date, ensuring you’re always burning the oldest, driest wood first. This disciplined approach means cleaner burns, less chimney maintenance, and ultimately, more time enjoying your fire instead of cleaning up after it.
When to Call for Professional Help
Even the most dedicated DIY enthusiast will encounter situations where professional expertise becomes essential. I learned this the hard way after attempting to repair a cracked chimney liner myself, only to discover the damage extended far beyond what I could see from inside the cabin. That experience taught me valuable lessons about recognizing my limits.
Certain red flags demand professional attention regardless of your skill level. Structural damage to the chimney, including visible cracks in masonry, separated joints, or a leaning stack, requires immediate expert assessment. Similarly, if you’ve experienced a chimney fire, even a small one, have a certified professional inspect the entire system before using it again. Heavy creosote buildup that resists your cleaning efforts, persistent downdrafts that you can’t resolve, or smoke entering your living space through unexpected areas also warrant professional help.
Finding chimney professionals willing to service remote living situations requires some detective work. Start by contacting chimney sweep associations in your region, as they often maintain networks of professionals who specialize in rural and off-grid properties. Local hardware stores and building supply companies serving your area can provide valuable referrals. Fellow off-gridders in your region are perhaps your best resource, so tap into community forums and social media groups.
Expect to pay premium rates for remote service calls. Travel fees typically add 50-100 dollars or more to standard rates, and professionals may require minimum job values to justify the journey. Basic inspections run 150-300 dollars, while repairs vary widely depending on complexity. Some chimney professionals offer seasonal circuits through remote areas, which can reduce costs significantly if you can schedule flexibly. When you do find a reliable professional, maintain that relationship and consider coordinating visits with neighbors to share travel costs.
Common Mistakes That Could Cost You Your Cabin
I learned about the cardboard chimney cleaning myth the hard way during my second winter at our remote homestead. A well-meaning neighbor swore that burning a few boxes would “blast out the creosote,” and I nearly paid the ultimate price. What actually happened was a chimney fire that woke me at 2 AM with a sound like a freight train roaring through my roof. The fire department was forty-five minutes away. I got lucky, but my chimney didn’t—it needed a complete rebuild.
This dangerous practice tops the list of shortcuts that can destroy your off-grid cabin. Burning cardboard, potato peels, or chemical “cleaning logs” doesn’t remove creosote; it often makes buildup worse or ignites it catastrophically. There’s simply no substitute for physical cleaning with proper brushes and rods.
Another costly mistake is the “set it and forget it” mentality. I’ve met countless off-gridders who installed their stove and chimney five years ago and haven’t inspected it since. One couple discovered their chimney liner had separated at a joint, venting deadly carbon monoxide into their living space. They only found out during a routine check they almost skipped. Your life depends on seasonal inspections, period.
Improper chimney configurations represent perhaps the most common error. I’ve seen everything from horizontal runs that violate basic physics to chimneys that don’t extend high enough above the roofline. One friend used single-wall pipe through his roof cavity instead of proper insulated chimney pipe, thinking he’d save money. His roof caught fire within a month. The rebuild cost him ten times what proper materials would have.
The reality is harsh: when you’re living remotely, mistakes don’t just cost money. They cost everything. Professional help is hours away, if it’s available at all. Your chimney system isn’t the place for improvisation or cost-cutting. Follow manufacturer specifications exactly, inspect religiously, and clean thoroughly. Your winter sanctuary depends on it.
Let’s be honest: crawling onto your roof with brushes and scrapers isn’t anyone’s idea of a perfect Saturday morning. There’s soot under your fingernails, creosote in your hair, and you’re balancing on a ladder while your neighbor with grid-tied electric heat is sipping coffee inside. But here’s what that neighbor doesn’t have: the deep satisfaction of complete self-reliance, and the quiet confidence that comes from truly understanding the systems keeping your home safe and warm.
I learned this lesson during my second winter off-grid, when a visiting friend asked if I ever worried about my chimney. The truth? I didn’t worry, because I knew exactly what was happening inside that flue. Every brush stroke, every inspection, every careful check of the chimney cap had given me an intimate knowledge of my heating system. That knowledge translated directly into peace of mind during howling winter storms when professional help was miles of impassable road away.
Chimney maintenance isn’t glamorous, but it’s genuinely empowering. Each time you complete a thorough cleaning, you’re not just removing creosote—you’re taking responsibility for your family’s safety. You’re building skills that can’t be taken away by power outages or service disruptions. You’re joining a long tradition of people who heat with wood and take pride in doing it right.
So embrace the soot. Learn to read the smoke. Trust your growing expertise. The peace of mind that comes from knowing your chimney is clean, your stove is properly maintained, and your home is genuinely safe? That’s worth every minute spent on maintenance, and it’s a cornerstone of successful off-grid living.