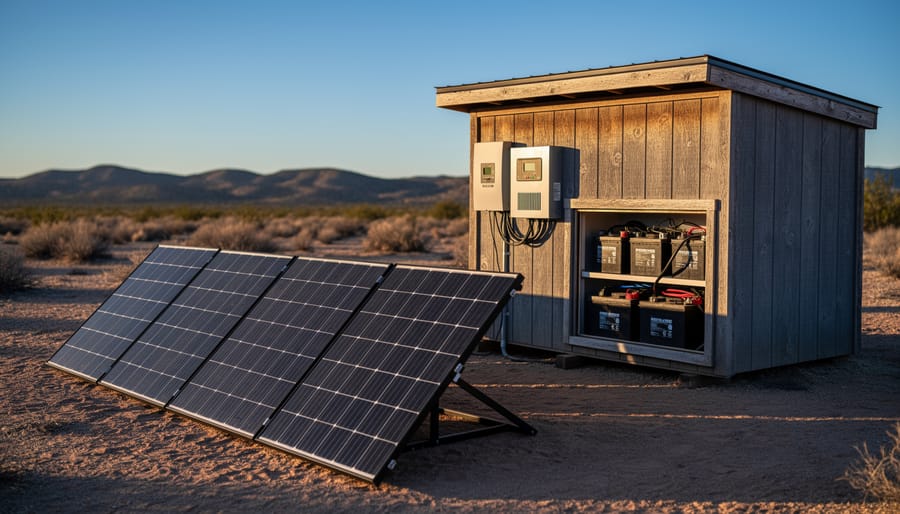
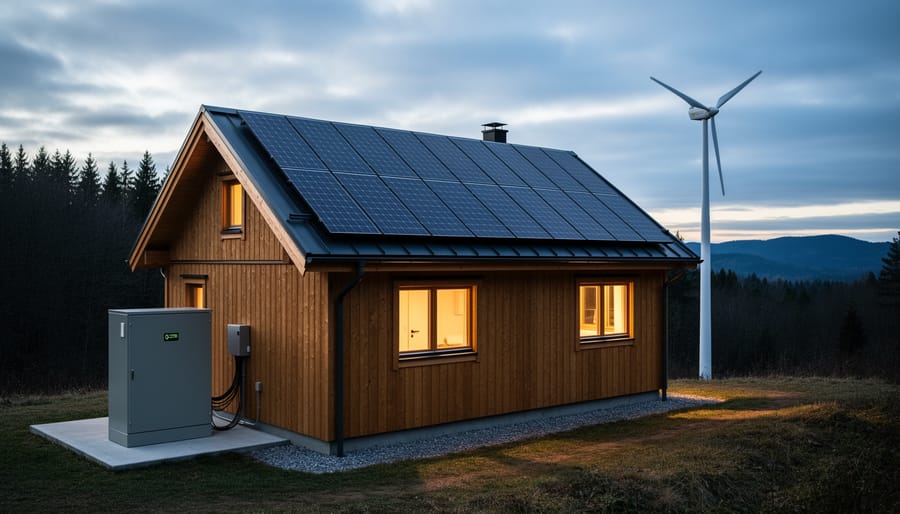
A hybrid off-grid power system combines solar panels, wind turbines, and backup generators to deliver reliable electricity when you’re living beyond the grid. The key is pairing renewable sources that complement each other (solar produces during the day, wind often picks up at night) with battery storage that holds surplus energy for when nature takes a break. Most systems require 3-7 days to install depending on your energy needs and site conditions, but the result is a power setup that won’t leave you in the dark during a week of cloudy weather or calm winds.
I learned this lesson the hard way during my first winter in a remote cabin. My solar-only setup worked beautifully through summer, but three consecutive overcast December days drained my batteries to nothing. No lights. No water pump. No way to charge essential devices. That’s when I discovered what experienced off-gridders already knew: redundancy isn’t just smart, it’s necessary.
The beauty of hybrid systems lies in their resilience. When one source underperforms, another picks up the slack. Your batteries act as the buffer, storing excess power and smoothing out the gaps. Add a propane or diesel generator as your final backup, and you’ve built a power solution that handles real-world conditions instead of ideal ones.
This guide walks you through everything you need to design, install, and maintain a hybrid system that matches your actual power demands. Whether you’re planning off-grid homestead ideas or already living off the land, you’ll learn which components work together, how to size your system correctly, and the safety protocols that protect both you and your investment.
Understanding Hybrid Off-Grid Power Systems
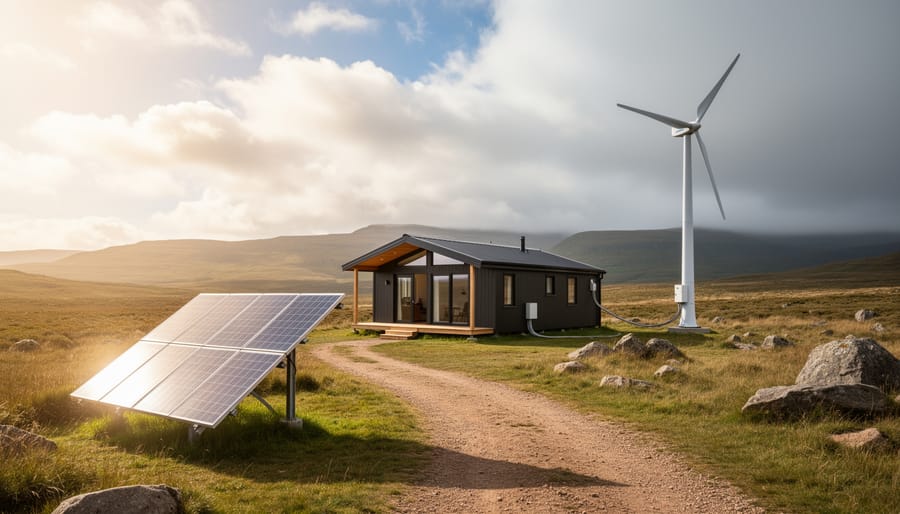
A hybrid off-grid power system pulls electricity from multiple renewable sources, typically solar panels, a wind turbine, and sometimes micro-hydro if you have flowing water nearby, with a backup generator standing ready when nature doesn’t cooperate. Instead of betting everything on one energy source, you’re building a team of power generators that cover for each other’s weaknesses. When clouds roll in for days and your solar production drops, the wind might be howling. When summer brings calm, sunny weather, those panels are cranking while your turbine sits idle. This approach mirrors how experienced backcountry travelers never rely on a single water source or navigation method, you build in backups because conditions change.
Single-source systems fail because renewable energy is inherently intermittent. Solar only works during daylight hours and tanks during storms or winter. Wind turbines need consistent breezes, which don’t happen on schedule. A research study confirms that a hybrid microgrid improves resilience compared to single-source setups, particularly in remote locations where grid connection isn’t an option. I learned this the hard way during my first off-grid winter when three straight weeks of gray skies drained my solar-only battery bank to dangerous levels. Adding wind capacity the following year transformed my system from anxious rationing to reliable abundance.
The magic happens in how these sources work together through a properly configured charge controller and battery bank. Your batteries become the central hub where all power flows in and out, smoothing the natural peaks and valleys of renewable generation. Solar might dominate during summer afternoons, wind takes over on blustery spring nights, and your generator only kicks in during those rare stretches when everything else falls short. This isn’t just about having more equipment, it’s about creating a resilient energy ecosystem that adapts to whatever weather patterns come your way.
Components and Equipment You’ll Need
Building a reliable hybrid off-grid system requires more equipment than a simple solar setup, but each component plays a crucial role in keeping your power flowing when any single source falls short. I learned this the hard way during my first winter off-grid when my solar-only system left me in the dark for three straight cloudy days.
Your hybrid system needs several core components working together. The solar array forms your primary daytime power source, plan on 400-800 watts minimum for basic needs, though most serious off-grid setups start at 1,200 watts or more. You’ll need proper mounting hardware rated for your local wind loads, and this isn’t the place to cut corners. I’ve seen poorly mounted panels turn into expensive flying debris during storms.
The charge controller acts as the traffic cop between your power sources and batteries. You’ll need one rated for your maximum combined input, either PWM for smaller systems or MPPT controllers for better efficiency with larger arrays. If you’re mixing solar and wind, you may need separate controllers since wind turbines often require specialized regulation.
Your battery bank stores all that generated power for use during low-production periods. Lithium iron phosphate batteries cost more upfront but last longer and handle partial charging better than traditional lead-acid. Figure on storing at least two days of your average usage, though three to five days provides better resilience. The batteries need proper ventilation and temperature protection, frozen batteries perform terribly, as I discovered one January morning.
- Solar panels and mounting hardware (sized to your daily consumption and sun hours)
- Wind turbine with tower (optional but valuable for windy sites and winter backup)
- Charge controller(s) rated for total system amperage
- Battery bank with appropriate amp-hour capacity and enclosure
- Pure sine wave inverter matched to your maximum simultaneous AC loads
- Backup generator (propane or diesel preferred over gasoline)
- Properly sized wiring, lugs, and connectors for all DC and AC circuits
- Battery monitor or comprehensive system monitor with shunt
- Safety equipment: disconnects, fuses, breakers, and grounding hardware
The inverter converts your stored DC power into household AC electricity. Pure sine wave models cost more than modified sine wave, but they’re essential for sensitive electronics and variable-speed tools. Size it for your largest expected simultaneous load plus 25 percent headroom.
Your backup generator bridges extended low-production periods. A 3,000-watt unit handles most cabin needs, though larger homes may need 5,000 watts or more. Propane generators store fuel indefinitely without degradation, unlike gasoline that gums up after months of sitting.
Finally, invest in a quality battery monitor with a shunt that tracks every amp in and out. Without accurate monitoring, you’re flying blind and will likely damage expensive batteries through improper charging. This single component has saved me from countless potential problems by catching issues before they became failures.
Assessing Your Site and Energy Needs
Before you spend a dollar on equipment, you need two critical pieces of information: what your site can realistically produce and how much power you’ll actually use. Getting these numbers wrong means either an undersized system that leaves you in the dark or thousands wasted on capacity you’ll never need.
Start with your energy consumption because that determines everything else. Don’t guess, track your actual usage for at least a week if you’re already living off-grid with a generator, or list every device you plan to power with its wattage and hours of daily use. A laptop might draw 60 watts for 4 hours (240 watt-hours), while a refrigerator could pull 150 watts around the clock (3,600 watt-hours). Add everything up to get your daily watt-hour total, then multiply by 1.3 to account for system losses and battery inefficiency. Most remote cabins land between 3,000 and 8,000 watt-hours per day, though that varies wildly based on whether you’re running power tools or just lights and electronics.
Now assess what your site can deliver. For solar, you need your location’s peak sun hours, which aren’t the same as daylight hours. Search for solar insolation data for your area or use tools like the National Renewable Energy Laboratory’s PVWatts calculator. Most of the continental U.S. gets 4 to 6 peak sun hours daily, varying by season. Walk your property at different times of day noting shade from trees, hills, or structures, even partial shading tanks solar output.
Wind assessment takes more effort. Mount an anemometer at your planned turbine height for at least a month to log actual wind speeds. You need consistent winds above 10 mph for turbines to make economic sense. Topography matters enormously, ridgetops and open plains work, but valleys and forested areas rarely do.
If you have flowing water, measure the flow rate in gallons per minute and the vertical drop in feet. Even a small creek with decent fall can generate serious power, but flow varies seasonally. Check it during your area’s driest month, not when snowmelt is gushing.
Match your site’s strongest resources to your power needs. A sunny location with moderate wind might lean 80% solar with wind backup, while a shaded site near a reliable stream could prioritize micro-hydro. This assessment shapes your entire system design.
Critical Safety Precautions Before You Begin
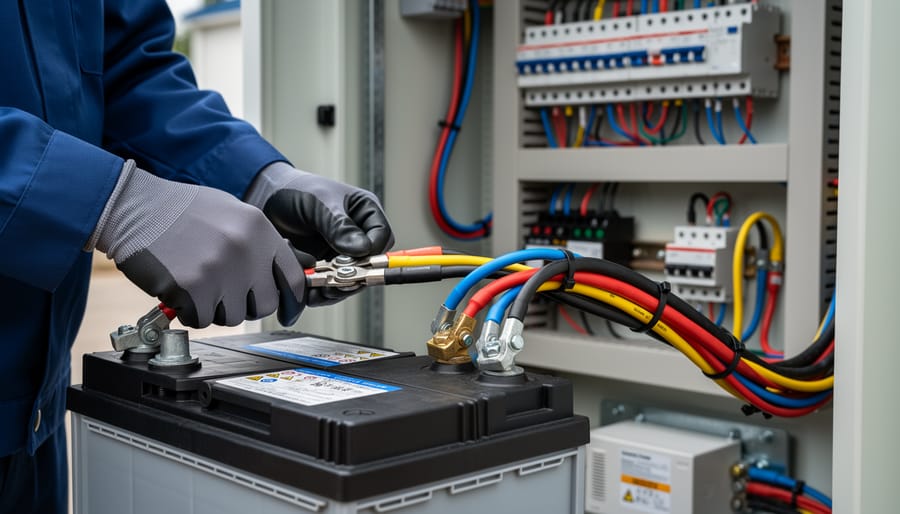
Before connecting a single wire, understand that hybrid off-grid systems handle serious electrical power, DC voltages from battery banks can deliver lethal current, and improper installation creates fire and electrocution risks. I learned this the hard way during my first solar setup when a wrench slipped across battery terminals and welded itself in a shower of sparks that left me shaken and far more cautious.
Start by checking local building codes and electrical permits required in your area. Many jurisdictions require licensed electrician sign-off for grid-tied inverters or systems above certain wattages, and you’ll need these permits to live off-grid legally without facing fines or forced disconnection. Don’t skip this step, I’ve seen beautiful systems torn out because owners assumed remote locations meant no oversight.
Battery safety demands respect. Lead-acid and lithium batteries release hydrogen gas during charging, so install your battery bank in a ventilated space away from ignition sources. Wear safety glasses and gloves when working around flooded lead-acid batteries, sulfuric acid will burn skin and destroy clothing instantly. Never lay tools across battery terminals, and always remove jewelry before working on the system.
Working at heights for panel mounting or turbine installation requires proper fall protection, especially on rooftops or towers above six feet. Use harnesses, secure ladders on level ground, and work with a partner who can call for help if something goes wrong. Weather matters too, never install panels during wind or on wet surfaces.
Know your limits. Hire a licensed electrician if you’re uncomfortable with any aspect of the installation, particularly main panel connections, grounding systems, or generator integration. The few hundred dollars for professional help beats a house fire or fatal shock, and many insurance policies require professional installation for coverage. Your system will outlast you if built safely, cut no corners protecting yourself and your family during construction.
Step-by-Step Installation Process
Step 1: Install Your Primary Renewable Source
Most hybrid systems start with solar panels as the primary power source because they’re reliable, proven, and relatively straightforward to install. Before you climb onto a roof or mount anything, walk your property at different times of day. You want the spot with the longest unobstructed sun exposure, typically a south-facing location (in the Northern Hemisphere) with no shade from trees, buildings, or terrain features between 9 AM and 3 PM.
Once you’ve identified your site, secure mounting rails or ground mounts according to manufacturer specs. Rooftop installations need proper flashing and weatherproofing, don’t shortcut this or you’ll regret it during the first heavy rain. Ground mounts should be anchored in concrete footings deep enough to prevent frost heave and wind damage. If you’re new to this process, the detailed guide on how to build a solar system walks through panel positioning and wiring fundamentals.
Wire your panels in series, parallel, or series-parallel configuration depending on your charge controller’s voltage requirements. Use MC4 connectors rated for outdoor exposure and run cables through conduit wherever they’re exposed to physical damage or UV. Connect the array output to your charge controller’s solar input terminals, double-checking polarity before applying power. The controller should be mounted near your battery bank in a cool, ventilated location, not in direct sunlight or where temperatures exceed its operating range.
Step 2: Set Up Your Battery Bank
Your battery bank is the heart of your hybrid system, it stores all that renewable energy for when you actually need it. I learned this lesson the hard way during my first installation when I squeezed four deep-cycle batteries into an unventilated closet. Within months, corrosion had destroyed the terminals and hydrogen buildup had warped the enclosure. Don’t repeat my mistake.
Start by selecting a location with consistent temperature, proper ventilation, and easy access for maintenance. Batteries should sit on a non-conductive platform, I use rubber mats over plywood, and never directly on concrete or metal. Install venting to the outside if you’re using flooded lead-acid batteries, as they release hydrogen during charging. Even sealed AGM batteries benefit from airflow to manage heat.
For wiring configuration, connect batteries in series to increase voltage (positive to negative), in parallel to increase capacity (positive to positive, negative to negative), or combine both for series-parallel configurations. Most off-grid systems run 24V or 48V, requiring multiple 12V batteries in series. Use appropriately sized cables, undersized wires create dangerous heat and voltage drop. I always use marine-grade lugs and apply anti-corrosion paste to every terminal.
Connect your battery bank to the charge controller’s battery terminals, double-checking polarity before tightening connections. Install a battery monitor or shunt to track state of charge, voltage, and current flow. This data becomes invaluable for understanding your system’s performance and preventing over-discharge.
Step 3: Wire Your Inverter and Distribution Panel
I still remember the nervous excitement of connecting my inverter for the first time, this is where your carefully stored DC power becomes the AC electricity that runs your life. Start by positioning your inverter as close to your battery bank as practical, ideally within six feet to minimize voltage drop on the thick DC cables.
Cable sizing isn’t negotiable here. For a 3,000-watt inverter on a 24-volt system, you’ll need at least 4/0 AWG cable to handle the 125+ amp draw without dangerous heat buildup. Use a wire sizing calculator specific to DC systems and always round up. Secure both positive and negative cables with proper crimped lugs, this isn’t the place for improvised connections.
Install DC disconnects between batteries and inverter first. These let you safely work on the inverter and serve as emergency shutoffs. Mount them within easy reach and label clearly. Connect your inverter following the manufacturer’s exact sequence (usually negative first, then positive) and torque terminals to specification.
On the AC side, wire your inverter output to a main breaker panel sized for your loads. Install this panel near the inverter with properly rated breakers for each circuit, 15 amps for lighting, 20 amps for kitchen outlets, dedicated circuits for high-draw appliances. Include a transfer switch here if integrating a generator. Keep all wiring neat, labeled, and secured. Double-check polarity before energizing anything.
Step 4: Integrate Secondary Power Sources
By the time you’re ready to add your second renewable source, your solar array and battery bank are already functioning, now you’ll create the redundancy that makes a hybrid system truly reliable.
If you’re adding a wind turbine, run dedicated cables from the turbine to a second charge controller rated for your turbine’s output. Never combine wind and solar into a single controller, they generate power at different voltages and times, and mixing them creates charging conflicts that can damage batteries. Mount the wind controller near your battery bank, keeping cable runs short to minimize voltage drop.
For micro-hydro systems, the installation is similar: dedicated controller, independent wiring, proper grounding. The beauty here is that hydro often generates power at night when solar is dormant, naturally balancing your system’s 24-hour production.
Configure each controller’s charging parameters to match your battery bank specifications, bulk voltage, float voltage, and equalization settings must align across all controllers or you’ll end up with one source fighting another. I learned this the hard way when my wind controller kept pushing voltage higher while my solar controller tried to maintain float, creating a tug-of-war that shortened my battery life by years.
Test each source independently before running them simultaneously. Verify that adding the second source doesn’t trigger overcharge protection, and watch your system monitor to confirm both sources contribute appropriately as conditions change throughout the day.
Step 5: Connect and Configure Your Backup Generator
Your backup generator serves as the safety net when renewable sources can’t keep up, but connecting it improperly can damage your entire system. The key is controlling how generator power flows into your batteries and loads.
Start by mounting your transfer switch near your main distribution panel. For automatic switches, wire the generator output to the transfer switch input, then connect the switch output to your inverter’s AC input port. This allows the inverter to use generator power intelligently without bypassing your battery bank. Manual switches work similarly but require you to flip them when starting the generator.
Most quality inverters include generator charge settings in their programming menu. Access this through the display panel or connected app and set your bulk charge voltage to match your battery type, typically 14.4V for flooded lead-acid or 14.6V for AGM batteries. Critically, set the float voltage lower (around 13.6V) to prevent overcharging once batteries reach full capacity. Configure the maximum charge current to 10-25% of your battery bank’s amp-hour rating.
I learned this lesson the hard way when I initially set my generator charge rate too high, causing my batteries to bubble and lose electrolyte. Now I keep it conservative at 15% of capacity, which means slightly longer generator run times but dramatically extended battery life.
Testing and Verifying System Performance
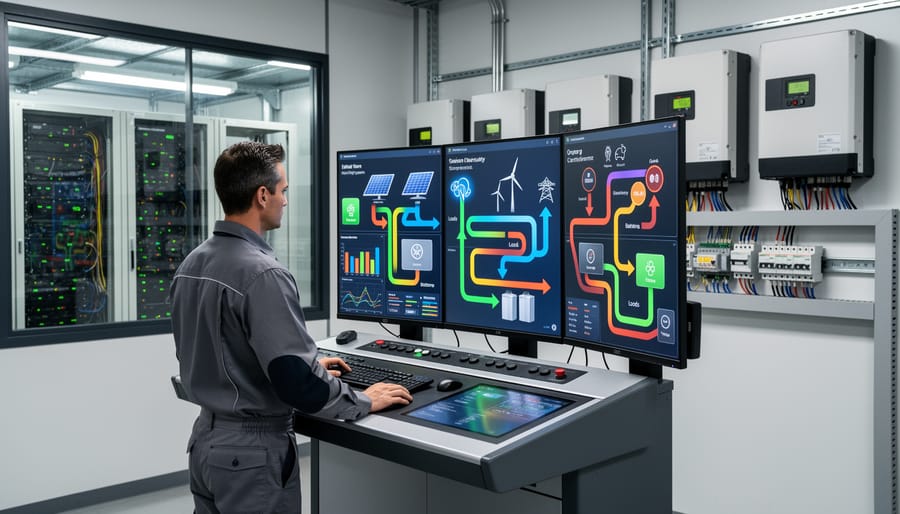
The moment you flip that first switch carries real weight, you’re about to see if weeks of planning and installation pay off. But rushing this stage invites expensive mistakes. I learned this after a hasty first power-up tripped every safety device I’d installed and left me troubleshooting in the dark with a headlamp. Power up methodically, one component at a time, and you’ll catch problems before they cascade.
Start with your battery bank isolated from everything else. Check that terminals are tight, voltage across each battery matches specifications (typically 12.6V for a rested lead-acid, 13.3V for lithium), and no cell shows more than 0.2V difference from its neighbors. Sniff for any sharp, chemical odor that signals overheating or venting. Then connect your charge controller to the batteries, watching that its display initializes and shows correct voltage. No smoke, no sparks, no burning smell, these are your green lights.
Next, connect your primary power source while monitoring the charge controller display. Solar panels should show incoming current when sunlight hits them; a wind turbine should display generation when spinning. Watch for steady charging current flowing into your batteries, not erratic spikes. Your battery voltage should climb gradually as they charge, not jump instantly or stay flat. If current reads zero despite available sun or wind, check polarity and fuse continuity before going further.
Now bring your inverter online. With no AC loads connected yet, it should hum quietly and display clean voltage around 120V (or 230V for international systems). Use a multimeter on its output to verify proper voltage and frequency before plugging in anything. This is where you catch wiring errors that could fry your electronics.
Follow this testing sequence over your first 24 hours:
- Hour 1: Monitor all connection points for warmth, connections should be barely warm to touch, never hot enough to keep your hand on for more than a second.
- Hour 3: Check that your monitoring system accurately reflects power generation, battery state of charge, and any loads you’ve connected. Compare its readings to your multimeter measurements.
- Hour 6: Introduce a small AC load like a lamp or phone charger and verify the inverter maintains steady voltage under load without alarms.
- Hour 12: Test your backup generator’s automatic start (if equipped) by simulating low battery voltage or connect it manually and verify it charges batteries without conflict from other sources.
- Hour 24: Review your system logs for any anomalies, voltage sags, charging interruptions, or error codes that didn’t trigger immediate alarms but signal underlying issues.
Red flags demanding immediate shutdown include any burning smell, visible sparks, battery temperatures exceeding 120°F, voltage readings wildly different from expected values, or repeated breaker trips. These aren’t minor glitches to monitor, they’re urgent problems. Disconnect power, identify the fault, and fix it before proceeding.
When everything checks out, you’ll see steady charging during generation periods, batteries holding voltage overnight, clean inverter output under varying loads, and all components running cool and quiet. That’s your system telling you it’s ready for real work. The first week remains a proving period, check connections daily and stay alert to changes, but you’ve cleared the critical hurdle.
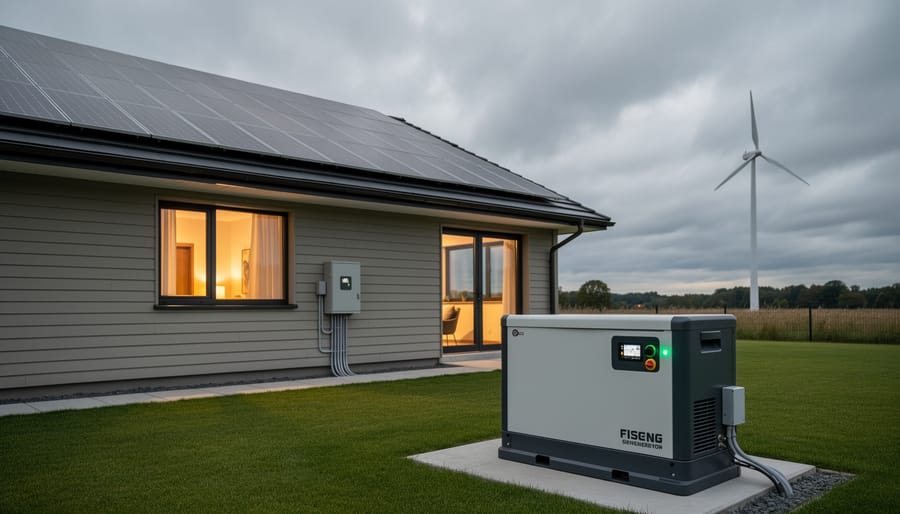
Optimizing Your System After Installation
Your system works, but it won’t work at its best until you spend a few weeks learning its rhythms. I found this out the hard way when my batteries consistently dropped to 40% overnight during my first month, turns out my charge controller’s bulk voltage was set too conservatively for my battery chemistry.
Start by adjusting your charge parameters based on actual performance. Most systems ship with generic settings that won’t match your specific battery bank. Check your battery manufacturer’s specs for absorption voltage, float voltage, and equalization requirements. My flooded lead-acid bank needed 14.4V absorption, but the controller defaulted to 14.1V, leaving me chronically undercharged.
Balance your loads strategically between power sources. Run high-draw appliances like washing machines or power tools during peak solar hours when panels can handle the load directly. Save evening cooking for propane rather than an electric stove that drains batteries. On windy nights, I’ll charge tool batteries and run the dehumidifier because my turbine is producing anyway, why not use it?
Seasonal adjustments matter more than you’d expect. In winter, tilt your solar panels steeper to catch low-angle sun. Your wind turbine becomes your primary source during stormy months, so verify those connections are still tight after summer dormancy. I also lower my float voltage slightly in hot weather to prevent battery gassing.
Watch your battery temperature and state of charge religiously for the first month. If batteries consistently drop below 50%, you’re undersized or overconsuming. True power independence comes from matching your lifestyle to your system’s actual capacity, not wishful thinking about what it should handle.
Common Questions About Hybrid Off-Grid Systems
How much does a hybrid off-grid system actually cost? Expect to invest $15,000 to $40,000 for a complete residential setup, depending on your energy needs and the number of power sources you integrate. A basic solar-only system might run $8,000 to $12,000, but adding wind capability, a quality battery bank, and backup generator pushes costs higher. The silver lining? These systems typically pay for themselves within seven to twelve years through eliminated utility bills, and components like solar panels now last 25-plus years. I’ve watched friends justify the upfront expense by viewing it as buying decades of energy independence in one transaction rather than paying monthly bills forever.
How often do hybrid systems need maintenance?
Plan for quarterly battery checks (water levels, connections, voltage testing) and annual deep inspections of all components. Solar panels need occasional cleaning, wind turbines require bearing lubrication yearly, and generators need oil changes based on run hours.
When should I replace my battery bank?
Quality deep-cycle batteries last five to fifteen years depending on type and how well you maintain them. Flooded lead-acid batteries typically need replacement after six to eight years, while lithium systems can push twelve to fifteen years with proper care.
How long will my generator run during cloudy stretches?
Most hybrid systems only need the generator for two to four hours daily during extended low-production periods. A well-designed battery bank stores enough capacity that brief generator runs can recharge it, rather than running continuously.
Can I expand my system later as my needs grow?
Absolutely, and this is where hybrid systems shine. You can add more solar panels, a second wind turbine, or upgrade your battery bank in stages as long as your charge controllers and inverter have the capacity.
What happens during a week of overcast, windless weather? This scenario worries everyone, but a properly sized hybrid system handles it through strategic battery reserves and calculated generator use. Your battery bank should store three to five days of typical consumption, giving you a cushion before firing up the backup generator. During those challenging periods, you’ll also naturally reduce energy usage by running only essential loads and timing heavy consumption for when your generator runs. I learned to check weather forecasts and top off batteries before predicted low-production stretches, then treat those periods as opportunities to practice energy-conscious living rather than stress over dwindling reserves.
The reality check? Your system will occasionally require all its components working together, and that’s exactly why you built it as a hybrid rather than relying on a single source. Those rare challenging weeks validate the entire approach and remind you why backup capacity matters.
Setting up a hybrid off-grid power system is one of the most empowering steps you can take toward true self-sufficiency. I’ll never forget the first night my own system powered every light in the cabin, charged my tools, and kept the refrigerator running without a single worry about fuel or grid connection. That sense of freedom never gets old.
You’ve now got the blueprint for reliable, resilient power anywhere you choose to live. Start with a solid plan based on your actual energy needs and your site’s renewable resources. Don’t rush the assessment phase, measuring your consumption patterns and solar exposure will save you from expensive mistakes later. Prioritize safety at every step, particularly when working with batteries and high-voltage connections. If you’re uncertain about any electrical work, bringing in a licensed professional for a few hours is money well spent.
Once your system is running smoothly, focus on monitoring your usage patterns for the first few months. You’ll learn which appliances draw the most power and when your batteries charge most effectively. This knowledge becomes invaluable when planning future expansions, whether that’s adding more panels, upgrading your battery capacity, or coordinating with other self-sufficiency projects like year-round food planning.
The learning curve is part of the adventure. Embrace it, stay curious, and enjoy the independence you’ve built.